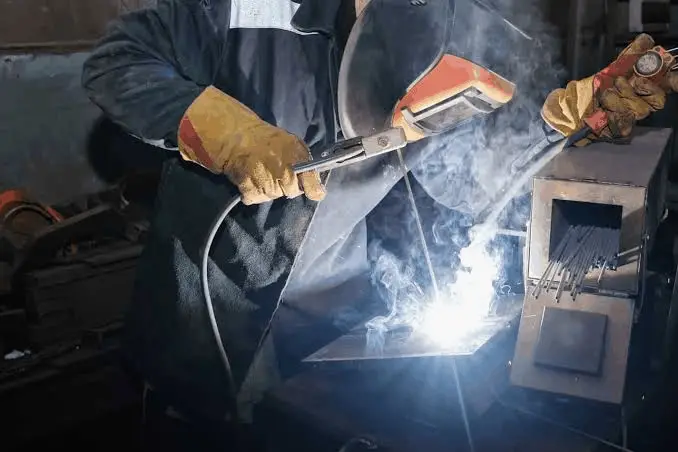
Welding distortion is something both beginners and experienced welders will be exposed to during the welding process. The primary reason for welding distortions is the expansion and contraction of the base plate due to heat from the welding arc. Knowing how these distortions occur is important in controlling and fixing them.
What are welding distortions?
It is not common to experience distortions during the welding process. Metals have a tendency of expanding and contracting whenever exposed to heat. There many factors that contribute to the distortions during heating and cooling of the base metal. For example, if you choose to focus all your welding on one side instead of alternating them you are going to experience more distortions.
Welding distortions are also influenced by the basic nature of metal. As you apply heat to the base metal its elasticity, yield strength and thermal conductivity all change. Such factors will influence uniformity of heat distribution as some areas expand more than others hence posing challenges during the cooling process.
Types of welding distortions
The type of metal, degree of restraint and residual stress all contribute to the type of welding distortions that you experience. In most applications, supplying your base metal with excess heat is the root cause for welding distortions.
- Longitudinal shrinkage
In this instance, you have perpendicular distortions to your weld. The primary cause for this is applying force parallel to the weld.
- Transverse shrinkage
Here you have the weld distortions moving vertically through the weld cross-section. The distortions are formed due to contractions that run perpendicular to the weld.
- Angular distortions
This is a form of transverse shrinkage and one of the most popular. It occurs on one side of the neutral axis as you apply stronger contractive force leading to the warping of metal in a particular direction. The other result is bowing which is as a result of longitudinal shrinkages that occur when a bend is not balanced along the neutral axis.
- Bucking
This is common among thin metal sheets and rectifying it is problematic.
Fixing welding distortions
Hammering
This is by far the most common way to fix weld distortions. Here you use a hammer, machine press wedge or any other hard instrument to hit the distortion into a flat surface. This is a time consuming exercise and needs one to use lots of force. However, it may not rectify some of the weld distortions hence the need for thermal corrective techniques.
Thermal correction
Here you apply heat to the distortion with the expectation that it will cool uniformly. Through a process called spot heating, you can remove distortions on thin sheets. You can apply heat on small spots/convex side of the base metal. Line heating can be used to correct angular distortions. Heat is applied on the opposite side of the weld along a straight line.
Welding distortion control
Part of fixing weld distortions is preventing them from taking place. You have to properly control the heating and cooling cycles. It is impossible to eradicate weld distortions but you can take several measures to control it.
Avoid Over-welding
If you want to reduce cases of weld distortion then you need to reduce the amount of metal on a joint. When welding get the right sizing for the joint, this helps you save time and weld metal. Using a slightly convex bead helps reduce the amount of weld metal in the fillet. When operating on metal plates that are thicker than 0.25 inches then you are reduce distortions by using beveling. If the metal is very thick then try to use double beveling. In some instances the welder does have a problem with distortion but if it is a serious cause of concern then identify joints that use less weld metal or choose a joint where the stress balance counteracts each other.
Presetting parts to avoid shrinkage forces
Instead of waiting for weld distortions to happen, you can anticipate them before hand by presetting parts before you can start welding. The premise for this is simple, create opposite mechanical forces through prebending, presetting, or prespringing the parts before distortions happen. It has been known that if you want to prevent distortions for a weld increase the length of the top groove during presetting of the plates. Once you remove the clamps thereafter, you will notice that the longitudinal shrinkage has been reduced through shortening it into a straight line. Another improvised way to reduce distortions is to place identical weldments back to back while clamping them together. Before removing the resultant clamps place welds on both assemblies and give them time to cool. This technique is combined with prebending.
Reduce number of welds passes
The rule is the more the number of weld passes the more shrinkages you experience. This is because it is better to have less weld passes with a larger electrode than having smaller electrodes with many passes. The shrinkage experienced tends to increase with each pass.
Working around neutral axis
You can do this in two ways, one is placing welds near the neutral axis so that you provide some level of leverage to the shrinkages forces so that they can pull any places that maybe out of alignment. The other way is to adjust the sequence of welding and design assembly so that one shrinkage force is able to offset the other.
Backstep welding
If you have the weld general progression running from left to right then you can reverse the sequential bead segment so that it is placed right to left. Once this placement beads are in place, the heated edges will expand to the very far weld side. The heat expansion is across the plate and to reduce distortion the opposite edges help to bring them back together.
Planning the weld sequence
In this technique the idea is to position the weld metal at various points in the assembly. This allows the distortions to be relegated to one section hence allowing the sequential welds to counteract the effects. This is particularly helpful in joint penetration groove welds where you can alternate the welds in the neutral axis from both sides.
Using penning to reduce distortions
Penning works in controlling the shrinkage forces as the weld beads cools. As the weld cools there is a lot of stress and penning helps relieve this by stretching the bead to make it thinner. You cannot use penning for the final pass or root bead. Alternatively, you can choose thermal stress techniques that allows controlled heating and cooling of the weld. This completely eliminates any chances of well stress.
Minimal welding time
Lastly, if you want to have less weld distortions make every effort to reduce the time you are welding. As you well know welding produces a lot of heat and this increases your chances of experiencing distortions.
Factors affecting welding distortions
Materials properties
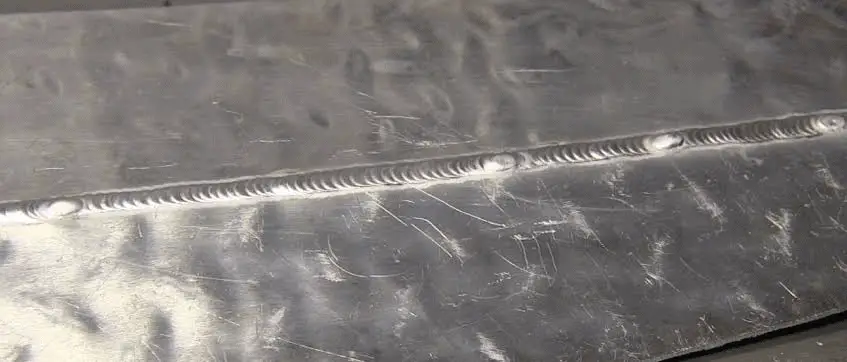
The coefficient of thermal expansion at a specific heat per volume is what determines distortion in metals. Distortions are based on the expansion and contraction of a metal. While the expansion is uniform the cooling is not. The coefficient of thermal expansion determines the various stresses in a welded metal. Some metals like stainless steel tend to have higher coefficient of expansion hence they are more prone to distortions than other metals. The distortions are there for the metal under welding to relieve its internal stresses. To prevent distortions in joints one places some restraints like butt welds. If your restraint produces more stress to your metal then you may end up cracking your weld.
Joint design
How you design your joints will determine the kind of distortions you experience. It is known that filler and butt joints tend to produce more distortions. You can reduce this by reconfiguring your joints such that it balances the thermal stresses for a particular plate thickness. Choose a single-sided weld to a double sided weld. You can also do fit ups to produce consistent and predictable shrinkages. If your weld has larger joint gaps then know that this will be filled by the weld metal. The solution is to careful tack to prevent movement of some parts during welding.
If you are looking for general arc stability then it is imperative that you choose the right travel angle relative to the gun in a perpendicular position. This means choosing one that is of an angle of 5 to 15 degrees. If you go for travel angles of more than 25 degrees then expect more spatter and less weld penetration. The amperage and voltage of the welding machine will also determine the kind of distortions you get. You can easily download or get from fabrication shops the right welding amperage hence preventing irregular welds.
Conclusion
Many welders still battle with distortions even after they have acquired years of experience. Simple weld distortions can be eliminated through hammering or thermal sources. But, this does not completely eliminate distortions. The only way to avoid them is to curb or prevent them before they happen. Having the right joints and using the right welding procedures helps reduce chances of distortions.